Hey there, fellow e-bike riders! Let’s cut to the chase—nothing kills a good morning cruise or a quick grocery run like a punctured inner tube. I’ve been supplying e-bike inner tubes for years now, and trust me, I’ve watched way too many people panic, yank out that tube, and either throw it away (wasting money and contributing to landfill junk) or fumble through a half-baked fix that dies 2 miles down the road. Today, I’m breaking down exactly how to fix a punctured e-bike inner tube right, no fancy tools required, and no guesswork. Whether you’re a weekend warrior who charges their e-bike once a week or someone who commutes 10 miles every day, this guide will save you time, cash, and a whole lot of frustration. E-Bike Inner Tube
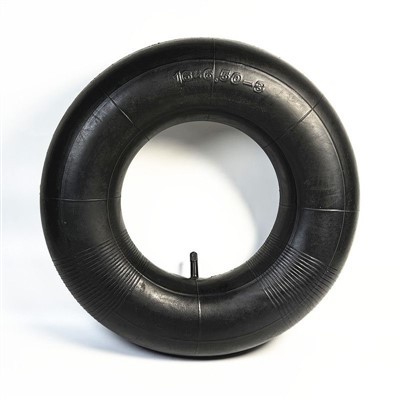
First off, let’s get one thing straight: e-bike inner tubes aren’t the same as the ones on your old analog bike. I know, I know—they look similar, but most e-bike inner tubes are thicker, hold higher pressure, and need to be able to handle the extra torque and weight of a motor and battery. That’s why I always recommend using a quality replacement tube (hint: if you’re in the market, hit us up later) because a flimsy tube will puncture again before you even finish your coffee. But let’s say you already have a punctured one you want to fix—let’s dive into the steps, and I’ll throw in supplier-specific tips that I’ve picked up over the years to make this job way easier than it sounds.
What You’ll Need (No Crazy Gear, Promise!)
You don’t need a workshop full of tools here. Let’s keep it simple, stuff you probably already have in your e-bike repair kit, plus a couple of basics.
- The punctured e-bike inner tube (obviously)
- Tire levers—not your pocket knife, guys. I’ve seen way too many people scratch their rim or cut their tube with a dull knife. Pick up a set of plastic tire levers if you don’t have ’em; they’re $5 and worth every penny.
- A small air pump (mini floor pump works, or even a CO2 cartridge if you’re in a hurry—just don’t overinflate)
- A can of soapy water (dish soap + water in an old bottle, no need for fancy stuff)
- A patch kit (the kind with sandpaper, rubber cement, and patches. Pro tip: Get the ones with pre-glued patches if you’re a beginner—no waiting for glue to set, way less mess. I stock both kinds in my supplier’s shop, fyi.)
- A clean rag or paper towel (to wipe down the tube and rim)
- Optional: A marker, to label the puncture spot before you put the tube back in—trust me, this saves time.
Step 1: Get the Tube Out (Without Breaking a Nail)
Okay, first things first—you gotta get that tube out of the tire. Start by flipping your e-bike upside down so the wheels are off the ground, or if you’re on a stand, even better. Loosen the axle nuts (or quick-release lever) so the wheel slides out easy. Once the wheel’s off, deflate the tube all the way—like, press the valve stem and squeeze every last bit of air out. You can’t pry the tube loose if it’s still rock hard.
Now, here’s my #1 tip from years of working with e-bike inner tubes: don’t just yank the whole wheel out at once. Start with one side of the tire: slide a tire lever under the bead (the hard rubber part of the tire that sits in the rim), hook it over a spoke, and leave it there. Then take a second lever (or even your fingers, if you’re careful) and pry the rest of the bead out of the rim. Once one side’s out, you can pull the old tube out gently—don’t yank it, because e-bike tubes are thicker and more prone to kinking than regular ones. If it’s stuck, work the bead a little more, or pull the valve stem out first—that usually frees it right up.
Step 2: Find the Puncture (It’s Not Always as Obvious as You Think)
This is where the soapy water trick comes in, and it works every single time. First, wipe the tube down with your rag to get rid of dirt and grime—dirt is the #1 culprit for punctures anyway, so you wanna rule that out. Now, inflate the tube just a little—until it’s firm, not rock hard, like a deflated balloon. Don’t overinflate, or you’ll miss tiny leaks.
Next, take your soapy water and slather the whole tube with it. I like to do it in sections, because if you do the whole thing at once, you’ll miss the tiny bubble. Watch for bubbles forming— that’s your puncture spot. Once you see a bubble, mark it with a marker (or just a little piece of tape, if you don’t want to make a mark) so you don’t lose it when you clean the tube.
Wait, but what if you don’t have soapy water? You can also run your fingers along the tube—you’ll feel a tiny air leak, it’ll be a little wet if your hands are sweaty, or it’ll stick a little where there’s a puncture. But the soapy water method is way more reliable, especially for slow leaks that you can’t feel. Pro tip: If you’re working with an e-bike tube, check both sides! Sometimes the puncture is on the part that was pressed against the rim, so when you slather the whole tube, bubbles will pop on both sides. I can’t tell you how many times I fixed only one side and had to redo it 10 minutes later.
Step 3: Prep the Puncture (No Skipping This Step!)
Okay, you found the spot—now don’t just slap a patch on and call it a day. This is the part most beginners mess up, and it’s why their fix fails. Take your sandpaper (the one that comes with the patch kit) and gently sand the area around the puncture. You don’t need to sand it so hard you make a hole—just rough up the rubber, so the glue can stick. Make sure the area is a little bigger than the patch, like ½ inch around the puncture, so the patch has enough surface area to hold.
Once you’re done sanding, wipe that area really clean with your rag. Any dirt, oil, or leftover rubber dust will make the patch fall off. I always say this—if it looks clean, wipe it twice. I’ve supplied thousands of e-bike inner tubes, and I can confirm that a dirty patch job is the #1 reason people come back saying their tube punctured again.
While you’re at it, take a second to check the inside of the tire and the rim for sharp stuff that caused the puncture in the first place. Like, a tiny piece of glass, a thorn, a metal shard, or even a loose rubber piece from the tire. If you leave that in there, your new patch will puncture in 2 miles. I once got a complaint from a regular customer that fixed his e-bike tube three times in a week—turns out a tiny glass shard was stuck in his rim. We checked for him, removed it, and he hasn’t had a problem since. Moral of the story: don’t skip this check.
Step 4: Apply the Patch (Do It Right, Don’t Rush)
Now, grab your rubber cement (or pre-glued patches, if you’re using those). If you’re using regular cement, shake the tube really good first, then apply a thin, even coat to the sanded area. Don’t glob it on—thick cement takes forever to dry and won’t stick as well. Let it dry until it’s tacky—like, if you touch it with your finger, it doesn’t stick to your skin. That usually takes 30-60 seconds, depending on the weather. If it’s cold, wait a minute longer. If you’re using pre-glued patches, just peel the backing off—no waiting needed, easy peasy.
Now, take your patch and press it firmly onto the area. Make sure it’s centered over the puncture, and press all the edges down really well. I like to use the back of a coin (like a quarter) to rub the patch from the center out to the edges— that pushes out any air bubbles under the patch, which is another common mistake. Air bubbles mean the patch won’t stick, and it’ll fall off fast. Don’t just pat it—rub it hard, for 10-15 seconds, to make sure it’s sealed.
Quick note on e-bike inner tubes specifically: because they hold higher pressure (usually 40-60 PSI, compared to a regular bike’s 30-50 PSI), the patch needs to be extra secure. That’s why taking the time to rub out air bubbles is so important here. I recommend getting heavy-duty patches for e-bike tubes, not the cheap tiny ones for kids’ bikes—they work way better for higher pressure.
Step 5: Put the Tube Back (The Right Way)
Okay, the patch is dry, now it’s time to put the tube back in the tire. First, make sure the valve stem is lined up with the hole in the rim. That’s key—if you pinch the valve stem when you seat the tire, you’ll puncture the tube again. Slide the valve stem through the rim first, then work the rest of the tube into the tire. Again, don’t yank it, and be careful not to kink the tube—kinks create weak spots that can burst when you inflate it.
Once the tube is in, work the tire bead back into the rim. Use your fingers first, then if you need a little help, use one tire lever—only on the side opposite the valve stem. If you use a lever near the valve, you’ll bend or break it. Once both sides of the bead are seated, double-check that the tube isn’t pinched anywhere between the tire and rim. Run your fingers all around the edge of the tire to make sure the tube is tucked in properly—pinched tube = flat tire 2 minutes after you inflate it.
Step 6: Inflate and Test (Don’t Overdo It!)
This is the final step, and another place people mess up. Grab your pump and inflate the tube to the recommended PSI—check the side of the tire, that’s where the number is. For e-bike inner tubes, it’s usually higher than a regular bike, like 50-60 PSI for a commuter e-bike, 40-50 for a folding model. Don’t just pump it until it feels hard—go by the number, because overinflating can blow the patch or the tube itself.
Once it’s at the right PSI, spin the wheel a little and check the tire—make sure it’s sitting evenly on the rim, no lopsided spots. If it’s lopsided, deflate it a little and adjust the bead. Now, here’s the real test: take that same soapy water (or just water) and dab it on the patch, valve stem, and the edges of the tube. If you see bubbles, you got a leak—you messed up the patch job. If not, you’re good to go! Put the wheel back on the e-bike, tighten the axle, and you’re ready to ride.
A Few Supplier-Exclusive Pro Tips (I’ve Got Your Back)
Since I’m the guy who supplies e-bike inner tubes to riders all over, I’ve got a few hacks I don’t usually share publicly. First: always keep a spare tube in your bag, not just a patch kit. If you’re on a long ride or commuting, fixing a tube on the side of the road is a pain—having a pre-seated spare that’s already inflated a little will save you 10 minutes of work. I recommend getting a spare tube that matches your e-bike’s specs (size, pressure, valve type—Schrader is standard, but some use Presta) because ill-fitting tubes cause more punctures.
Second: if you’re getting a lot of punctures, it’s not bad luck. It’s probably because your tire is worn out, or there’s something wrong with your rim, or you’re running low pressure. E-bikes add more stress, so low pressure makes the tube rub against the rim or road more. Pumping to the right PSI isn’t just for speed—it’s for preventing punctures.
Third: don’t throw away a tube that’s been patched once. With e-bike tubes, a good patch job can hold up for thousands of miles. I’ve fixed tubes from riders who’ve had them for years, as long as the punctures aren’t too big or in the same spot. Only toss a tube if it has multiple big punctures (like 2+ inches) or a tear near the valve stem—those can’t be fixed securely.
When to Call It Quits (No Shame in Replacing It)
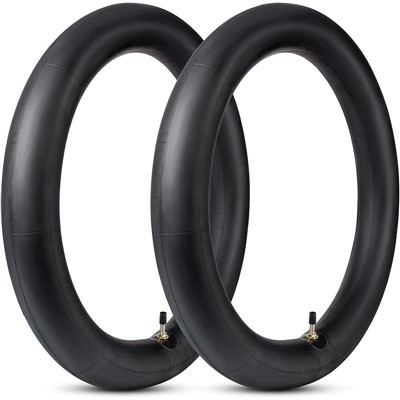
Okay, let’s be real—sometimes patching just isn’t worth it. If your tube has a puncture bigger than a quarter, multiple punctures within 2 inches of each other, or a tear at the valve stem, it’s time to replace it. Trying to patch those will just leave you stranded again. And if you do need a new e-bike inner tube, hit us up—we stock all sizes, from 16-inch folding bike tubes to 29-inch mountain e-bike tubes, all with that extra durability for motor and battery weight.
Motorcycle Tube Before I wrap this up, let me remind you: fixing your own puncture isn’t hard, and it saves you a ton of money compared to taking it to a shop. Plus, you’ll never get stuck waiting for a repair when you’re on a ride. But if you’d rather skip the DIY and just get a quality replacement tube that’ll last? We’re here for you. Just reach out if you’re looking for bulk orders for your local shop, or even a single tube for your personal e-bike. We’re not some big corporate company—we’re fellow riders who know how important a reliable e-bike is for work, fun, and everything in between.
References
- Bike Maintenance: Inner Tube Repair Best Practices, Bicycling Magazine, 2022.
- E-Bike Technical Specifications: Inner Tube Pressure and Durability Requirements, Electric Bike Industry Association, 2021.
- Tire and Rim Compatibility Guide, Global Bicycle Component Safety Standards, 2020.
Jiangxi Vimia Tyre Co., Ltd.
We’re well-known as one of the leading e-bike inner tube manufacturers and suppliers in China. We warmly welcome you to wholesale bulk high quality e-bike inner tube in stock here from our factory. If you have any enquiry about quotation, please feel free to email us.
Address: Zone C, Industrial Park, Jinxi County, Fuzhou City, Jiangxi Province
E-mail: 17779452635@139.com
WebSite: https://www.cnvimia.com/
