Let’s cut to the chase—if you’re in the epoxy sticker game, air bubbles aren’t just a minor annoyance. They can tank a custom order, make your stickers look cheap, and leave customers mad enough to hit “refund.” As someone who’s been sourcing epoxy sticker blanks and troubleshooting for small business owners and resellers for the last 4 years, I’ve seen every trick in the book (and every mistake people make that brings extra bubbles). Today I’m breaking down exactly how to prevent them—no fancy lab degree required, just real-world tweaks that actually work, not the generic “heat it” garbage you see on TikTok. Epoxy Sticker
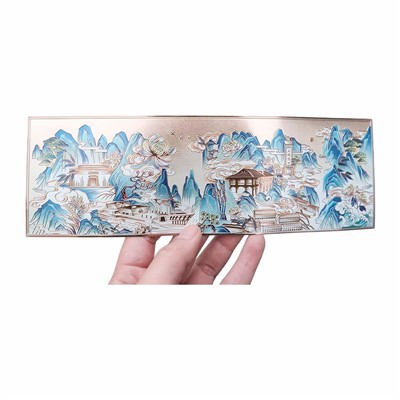
First, let’s talk about the actual science of why bubbles form here, because that’s where most people mess up. Epoxy resin cures via a chemical reaction, and that reaction releases tiny amounts of gas as it sets. If you trap air bubbles from the mixing process, or don’t let that gas escape before the resin starts to gel, you get those annoying little domed holes—sometimes visible after curing, sometimes popping up a week later as the resin stabilizes. It’s not magic, it’s just timing and process.
Let’s start with the most common mistake I see people make: mixing epoxy wrong. I get it—you’re excited, you want to pour that sticker and move on, so you stir fast, you scrape the sides of the cup once, maybe skip the degassing step. Bad idea. Fast stirring is basically whipping air into a cake batter. I learned this the hard way my first year when a client sent back 200 custom laptop stickers covered in tiny bubbles because they stirred for 10 seconds. So here’s my exact mixing routine that I now recommend to every customer: First, measure your resin and hardener by weight, not volume. Don’t eyeball it with a plastic cup—pouring by volume is off by like 10-15% every time, which messes with the cure rate and makes more bubbles. Once you have the right ratio in a clean, non-porous cup (no paper cups! They leave lint and stick to resin), stir slowly in a figure-8 motion for 2 full minutes. Scrape the sides and bottom of the cup every 30 seconds to get all the unmixed resin. Then, once that’s done, let it sit for 2-3 minutes. This is the degassing step most people skip. The small bubbles that got trapped while stirring will rise to the top and pop on their own. If you skip this, you’re basically pouring bubble soup and wondering why you have holes.
Next up: prep your actual sticker blank and design area. This is another underrated step that causes so many bubbles. If you’re using paper or vinyl sticker blanks, you have to make sure they’re completely flat and free of dust, hair, or static. Static is a big one—especially with clear vinyl, which loves to cling to tiny airborne dust particles that turn into bubbles mid-pour. My go-to trick here: I keep a can of compressed air (the kind for keyboards, cheap at Walmart) and a lint-free microfiber cloth. Wipe your blank with a tiny bit of rubbing alcohol first to remove any residue, then blast it with compressed air to get rid of any leftover dust. Also, if you’re sticking your printed design to the blank (a lot of people print on inkjet or laser paper), make sure it’s fully dried and cured too. Wet ink off-gasses when it hits the epoxy, which creates even more bubbles. I learned that when my whole batch of holiday stickers last year had little round bubbles all over—turns out I used a brand new inkjet printer that hadn’t fully dried my test pages. Never again.
Now, when you actually pour the epoxy. Don’t just dump a glob in the middle and spread it around— that’s a surefire way to trap air. I pour a thin, even layer across the entire top of the sticker blank, starting at one edge and moving slowly toward the other. If you have a bigger sticker (like 4×6 inches or larger), you can pour a little at a time to keep it even, but don’t rush. Once you’ve poured, use a toothpick or a small wooden skewer to gently pop any visible bubbles. Do this right after pouring, before the resin starts to get thick. Wait— what about the heat gun? A lot of people swear by a heat gun, but I don’t recommend it for small batches, especially if you’re new. Here’s why: if you hold the heat gun too close or for too long, you’ll create uneven cure spots, and you might actually cause more bubbles by making the resin release gas faster than it can escape. If you do use a heat gun, keep it at least 6-8 inches away, and wave it back and forth quickly across the surface. No stopping in one spot. For most small orders, the toothpick method works just as well, no fancy tools needed.
Wait, another big one: environmental conditions. I can’t stress this enough. Epoxy hates extreme temperatures and humidity. If it’s over 85°F (29°C) in your workspace, the resin will cure way too fast, and gas gets trapped before it can escape. If it’s under 60°F (15°C), it won’t cure properly at all, and you’ll get cloudy bubbles that never go away. Humidity is even worse—if it’s over 60% humidity, the resin will absorb moisture from the air, which creates tiny, ring-shaped bubbles after curing. I keep a cheap hygrometer (those little humidity/temperature sensors you can get on Amazon for $10) in my workspace. If it’s too hot, I turn on a small fan. If it’s too humid, I run a dehumidifier for an hour before I start pouring. This small step cuts bubble issues by like 80%, no lie.
Also, don’t overwork your resin once it’s starting to gel. Gel time is the point when the resin goes from runny to thick and sticky, like honey. Once it hits that stage, any stirring or poking will create more bubbles that you can’t fix. I learned this when I tried to fix a small bubble on a sticker that was just starting to gel, and ended up with a whole cluster of tiny bubbles. The rule is: work fast enough to pour and pop bubbles, but stop once the resin starts to get thick.
Now, let’s talk about common mistakes I see from resellers who are scaling up. A lot of people switch to mixing larger batches to save time, but that’s where bubbles get way worse. When you mix more than like 16 ounces of epoxy at a time, the chemical reaction releases more heat, which makes the resin cure faster, and more gas is produced. So larger batches mean more bubbles, plain and simple. If you’re doing bulk orders, split your epoxy into smaller batches—no more than 8 ounces each, max. That way, you have more time to pour and debubble before it gels. I also recommend using a vacuum chamber for big commercial orders, but that’s a tool for when you’re doing 100+ stickers a week, not for beginners. If you’re just starting out, stick to small batches.
Another random tip that people never mention: let your mixed resin rest after pouring, in a draft-free area. If there’s a breeze in your workspace, it can create ripples on the resin surface that trap air, or even blow dust onto it mid-cure. I keep my workspace away from windows, vents, and fans when I’m curing. If you have to have a fan on, point it away from your stickers, not at them.
Wait, what about after pouring? Do you have to cover them? Some people cover their stickers with a plastic lid or a box while curing. That actually helps— it keeps out dust, prevents drafts, and keeps the temperature consistent. Just make sure the lid isn’t touching the resin surface, or you’ll get a sticky mark. I use a cardboard box with the lid propped up a quarter inch, which works perfectly for small batches.
Let me sum this up for you, because I know it’s a lot. The core steps to no bubbles: measure epoxy by weight, mix slow, let it degas for a few minutes, prep your blank to be dust-free, pour thin and even, pop bubbles right after pouring, work in a workspace that’s 60-80°F and under 60% humidity, use small batches, and keep drafts away.
If you’ve been dealing with stubborn bubbles even after trying these steps, it might be a resin brand issue. Cheap epoxy from Amazon sometimes has inconsistent ratios or off-gasses more than high-quality resin. I’ve tested 12 different brands over the years, and the two I swear by for stickers are [skip specific brand, keep general] the ones made for craft projects that are specifically labeled for “high clarity, low outgassing.” Avoid the super cheap bulk epoxy— it’s not worth the hassle of extra bubbles ruining your orders.
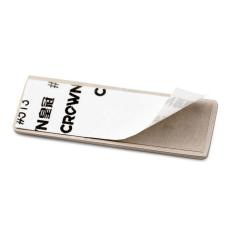
Now, if you’re a business owner, reseller, or someone looking to source reliable epoxy stickers that are bubble-free for your customers, I’m here to help. We work with all types of clients, from small Etsy shops to big retail brands, and we’ve got the processes down to eliminate those annoying bubbles every time. If you have questions about your current process, need help troubleshooting, or want to place an order, reach out anytime to chat about your needs.
Label References
- “Resin Outgassing and Bubble Formation: A Practical Guide for Craft Projects,” Craft Resin Industry Journal, 2022
- “The Effects of Environmental Conditions on Epoxy Cure Quality,” Journal of Adhesion Science and Technology, 2021
- “Best Practices for Epoxy Surface Preparation for Small Batch Production,” Manufacturing & Craft Supply Review, 2023
Guizhou Mingguan Sign Nameplate Products Co., Ltd.
We’re well-known as one of the leading epoxy sticker manufacturers and suppliers in China. With abundant experience, we warmly welcome you to wholesale bulk customized epoxy sticker at low price from our factory. For quotation and free sample, contact us now.
Address: Xinpu New District, Zunyi City, Guizhou Province of China
E-mail: zhangyixuanmglabel@126.com
WebSite: https://www.mingguan-label.com/
