If you’ve ever stood on a factory floor watching a Profile Roll Forming Machine transform a flat metal coil into a crisp, consistent architectural profile, you’ve probably wondered how those perfectly shaped rolls—no dents, no warps, no uneven edges—make that magic happen. As a Profile Roll Forming Machine supplier, I’ve spent the last 18 years guiding metal fabricators from residential siding manufacturers to large-scale structural steel plants through the process of designing custom rolls, and let me tell you: it’s not just about picking a random shape and cutting it into steel. It’s a mix of metallurgy, material science, hands-on trial and error, and a deep understanding of what your end product needs to do. Profile Roll Forming Machine

I still remember my first big client, a small gutter maker in Ohio back in 2006. They’d been buying generic rolls from a discount supplier, and every week they were throwing away 12% of their coil because the profile would kink at the final forming station. I spent three days with their foreman, pulling out every scrap of bad material, measuring every scratch and warp, and walking through the specs of their aluminum coil—3003-H16, 24 gauge, something no roll supplier at the time bothered to note. When we redesigned the rolls, shifting the angle of the final forming die by 2 degrees and adding a tiny radius to the edge roller, their scrap rate dropped to 1.5% within a month. That’s when I realized: good roll design isn’t a one-size-fits-all job. It’s tailored to the material, the profile, and the machine that’s doing the work.
Let’s start with the basics, because you can’t design a roll until you know what you’re working with. First, define your material. Is it steel, aluminum, copper, or a specialty alloy like stainless steel? What’s its gauge? And most importantly, what’s its temper? A-36 hot-rolled steel is way more ductile than 301 stainless steel in a full hard temper, so their roll designs can’t be the same. Aluminum, for example, work-hardens as it’s formed, so the roll sequence has to be gradual, not too abrupt. I once had a client try to run 6061-T6 aluminum through a roll sequence meant for 5052-H32, and they burned out two rolls in a week because the sharp bends were causing excessive friction. The material is the foundation of every design decision, so don’t skip that step.
Next, the profile itself. Are you making a simple U-channel, or something more complex like a standing seam roof panel with interlocking edges? Complex profiles need more forming stations—usually between 12 and 20, compared to 6 to 10 for simple shapes—because you don’t want to stretch or compress any part of the material too much at once. One common mistake I see new fabricators make is trying to cram all the forming into too few stations to save money. That leads to uneven material flow, which causes warping or cracking. The rule of thumb I always share: for every additional bend or edge detail on your profile, add one more station. That keeps the material’s stress evenly distributed, which is key to a consistent final product.
Now, let’s talk about the roll design process itself, step by step. The first thing we do at my company is create a 2D “flattened blank” of the profile. Wait—flattened blank? You’d think the flat coil just goes in and comes out shaped, but no. When you bend metal, its length changes slightly due to stretching and compressing. If you don’t account for that, your finished profile will be too short or too long, and none of the components will fit together. For example, a 10-foot standing seam panel might end up being 10 feet 1/8 inch if you just measure the flat profile directly. We use software to calculate the “neutral axis” of the material—the line where the length doesn’t change during forming—to get the exact length of the flattened blank. That’s non-negotiable. If that step is wrong, nothing else will work.
Once we have the flattened blank, we break down each bend and edge feature into individual forming steps. Each station on the roll machine does one small part of the shaping, and the rolls at each station have to be aligned perfectly. The gap between the top and bottom rolls is critical here. For soft materials like 5052 aluminum, the gap should be just a hair smaller than the material’s gauge—like 0.001 inch less—so the roll applies gentle pressure to guide the material without compressing it too much. For harder materials like stainless steel, the gap is exactly the gauge, because too much pressure will cause the roll to scratch the metal or even deform it. I always tell my team to test the gap with a feeler gauge before manufacturing the rolls, because even a 0.002-inch difference can throw off the entire profile.
Then there’s the roll profile itself—what shape is the actual die on the roll? This is where a lot of cheap suppliers cut corners. They’ll use a generic CAD file for a U-channel and just tweak a few dimensions, but that ignores friction and material flow. The edges of the rolls should have radii that match the material’s bend radius. For example, a sharp 90-degree bend in aluminum needs a radius at the edge of the roll that’s about twice the material’s gauge. If the radius is too small, the metal will crack; too large, and you’ll get a wavy edge. We also add a “bellmouth” to the lead of each roll— a slight slope at the entry point that guides the flat coil into the gap without catching. Without a bellmouth, the material can snag, causing scratches or even stopping the machine mid-run.
Material for the rolls is another big decision. Most suppliers use carbon steel for low-volume jobs, because it’s cheap and easy to machine, but it wears out quickly—after a few thousand runs, the rolls will develop grooves, which leave marks on the metal. For high-volume jobs, we recommend tool steel like D2 or S7. D2 is good for abrasive materials like galvanized steel, while S7 is tougher and better for materials that cause more friction, like stainless steel. We also coat the rolls with chrome or Teflon for smoother runs and less wear. I had a client making corrugated metal for agricultural barns who was going through carbon steel rolls every 50,000 feet. We switched them to chrome-plated D2 rolls, and they haven’t had to replace them in three years. The upfront cost is higher, but it saves a lot of money in the long run.
Alignment and calibration are just as important as the roll design itself. Even if you have the perfect rolls, if they’re not aligned with the machine’s axis, you’ll get uneven edges or the profile will twist. We always send our roll designs with detailed alignment guides, and we offer on-site calibration support for clients who are setting up a new line. Last year, a fabricator in Texas called me in a panic—their new rolls were making panels that curved like a banana. When we showed up, we found that the top and bottom rolls were misaligned by 0.003 inches, which was enough to throw off the entire run. A quick adjustment, and their panels were straight again. That’s why we don’t just sell rolls—we partner with clients to make sure they’re installed correctly.
Testing is the final step before full production. We always run a sample with the new rolls using scrap material first. We measure every dimension: the width of the profile, the angle of each bend, the height of the edges. We check for scratches, warps, or cracks. If something is off, we adjust the roll design before the client commits to full production. I once had a client making window trim that was supposed to have a ¼-inch overhang on each side. The first sample had an overhang that was 3/16 inch on one side and 5/16 on the other. We went back to the design, adjusted the side rolls by 1 degree, and the next sample was perfect. Testing isn’t a waste of time—it prevents costly mistakes later.
I’ve seen too many fabricators treat roll design like an afterthought, but it’s the heart of the entire profile roll forming process. A well-designed roll set doesn’t just make a good product—it reduces scrap, increases machine speed, and extends the life of your equipment. Over the years, I’ve worked with hundreds of clients, and the ones who invest time in getting the roll design right are the ones who stay competitive, even when material costs go up or demand shifts.
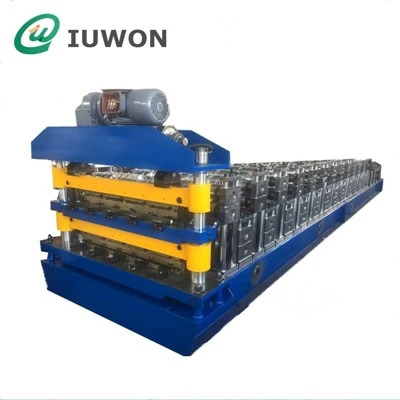
If you’re struggling with a current roll set—scrap rates too high, inconsistent profiles, frequent roll replacements—or you need a custom roll design for a new profile, don’t try to figure it out on your own. As a Profile Roll Forming Machine supplier with decades of hands-on experience, we can work with you every step of the way: from defining your material specs to designing the rolls, calibrating your machine, and supporting you long after installation. There’s no such thing as a “perfect” roll design, but there is a perfect one for your specific needs. Let’s talk through your project and find a solution that works for you.
Cable Tray Roll Forming Machine References
- Halmos, G. T. (2006). Roll Forming Handbook. CRC Press.
- Kalpakjian, S., & Schmid, S. R. (2021). Manufacturing Processes for Engineering Materials (7th ed.). Pearson.
- Tschätsch, H., & Dietrich, J. (2019). Cold Forming of Metals: Processes, Tools, and Equipment. Carl Hanser Verlag.
- American Iron and Steel Institute. (2018). Steel Sheet Metal Forming Guidelines for Roll Forming. AISI.
Hanghzou IUWON Technology Co., Ltd.
Hanghzou IUWON Technology Co., Ltd. is one of the most professional profile roll forming machine manufacturers and suppliers in China. Please feel free to buy high quality profile roll forming machine made in China here from our factory. For price consultation, contact us.
Address: No.755, Xintangtou Village, Xinjie Street, Xiaoshan District, Hangzhou, Zhejiang
E-mail: sales@iuwon.com
WebSite: https://www.iuwonforming.com/
